When Everything Goes Sideways (And the Cake Still Turns Out Freaking Amazing)
Apr 16, 2025You know those moments when you've planned everything down to the last detail... and then life just laughs at you?
That was my course launch week.
After months—literal months—of planning, testing recipes, writing, and dreaming, the course was finally ready. I had live demos scheduled, materials prepped, excitement brewing. Everything was (mostly) in place.
And then my daughter got sick.
Not just a little cold—walking pneumonia. She was home all week, coughing constantly, needing extra care and comfort. And I mean, of course she did. She's my girl, and she needed her mama. But it meant that the time, focus, and mental clarity I had counted on to finalize my demo setups... was gone.
Still, I went live. It wasn’t perfect. We had tech hiccups. I didn’t get to test things the way I wanted. But my students were gracious, patient, and even with the chaos, it worked. They learned, asked great questions, and gave me so much grace.
Then I sat down to edit the replay.
I got 3/4 of the way through this long video and realized—the last 40 minutes of audio was missing.
Gone.
As it turns out, my sweet sick child, who had been “helping” behind the scenes as my assistant director, had accidentally muted the recording. The live stream still had sound, so the students heard everything in real time... but the replay? Silence.
At this point, I hadn’t slept much in days. My daughter was finally starting to feel better, and I was ready to reset, regroup, and get back on track.
The next morning, while taking her vitamins and getting ready to finally go back to school, she walked in holding a piece of tooth in her hand and said, “I’m not sure where this came from.”
Needless to say, I didn’t work on course content that morning either.
(Thankfully, it was just a baby tooth that had broken weirdly and came out the rest of the way at the dentist with no issue.)
And then came the second live demo.
This time, I didn’t have anyone to help. One of my cameras glitched. My students ended up watching from awkward, unplanned camera angles. The tech did not cooperate. Again.
But the cake?
The cake was magic.
It was an Orange Cardamom Cake with Fig Apricot Compote, Whipped Roasted White Chocolate Ganache, Vanilla Bean Swiss Meringue Buttercream, and Toasted Hazelnuts.
And my daughter—my unfiltered, brutally honest taste tester—took a bite and said:
“This cake is freaking amazing. Like, I could say freaking a thousand times for this cake.”
And at that moment... it was all worth it.
Ironically, I roasted white chocolate this week for the first time since pastry school—completely unaware of how perfectly it would mirror my entire launch experience.
Because if there’s one culinary process that captures what this week felt like—how messy, chaotic, and confusing it was—it’s roasting white chocolate.
Hear me out.
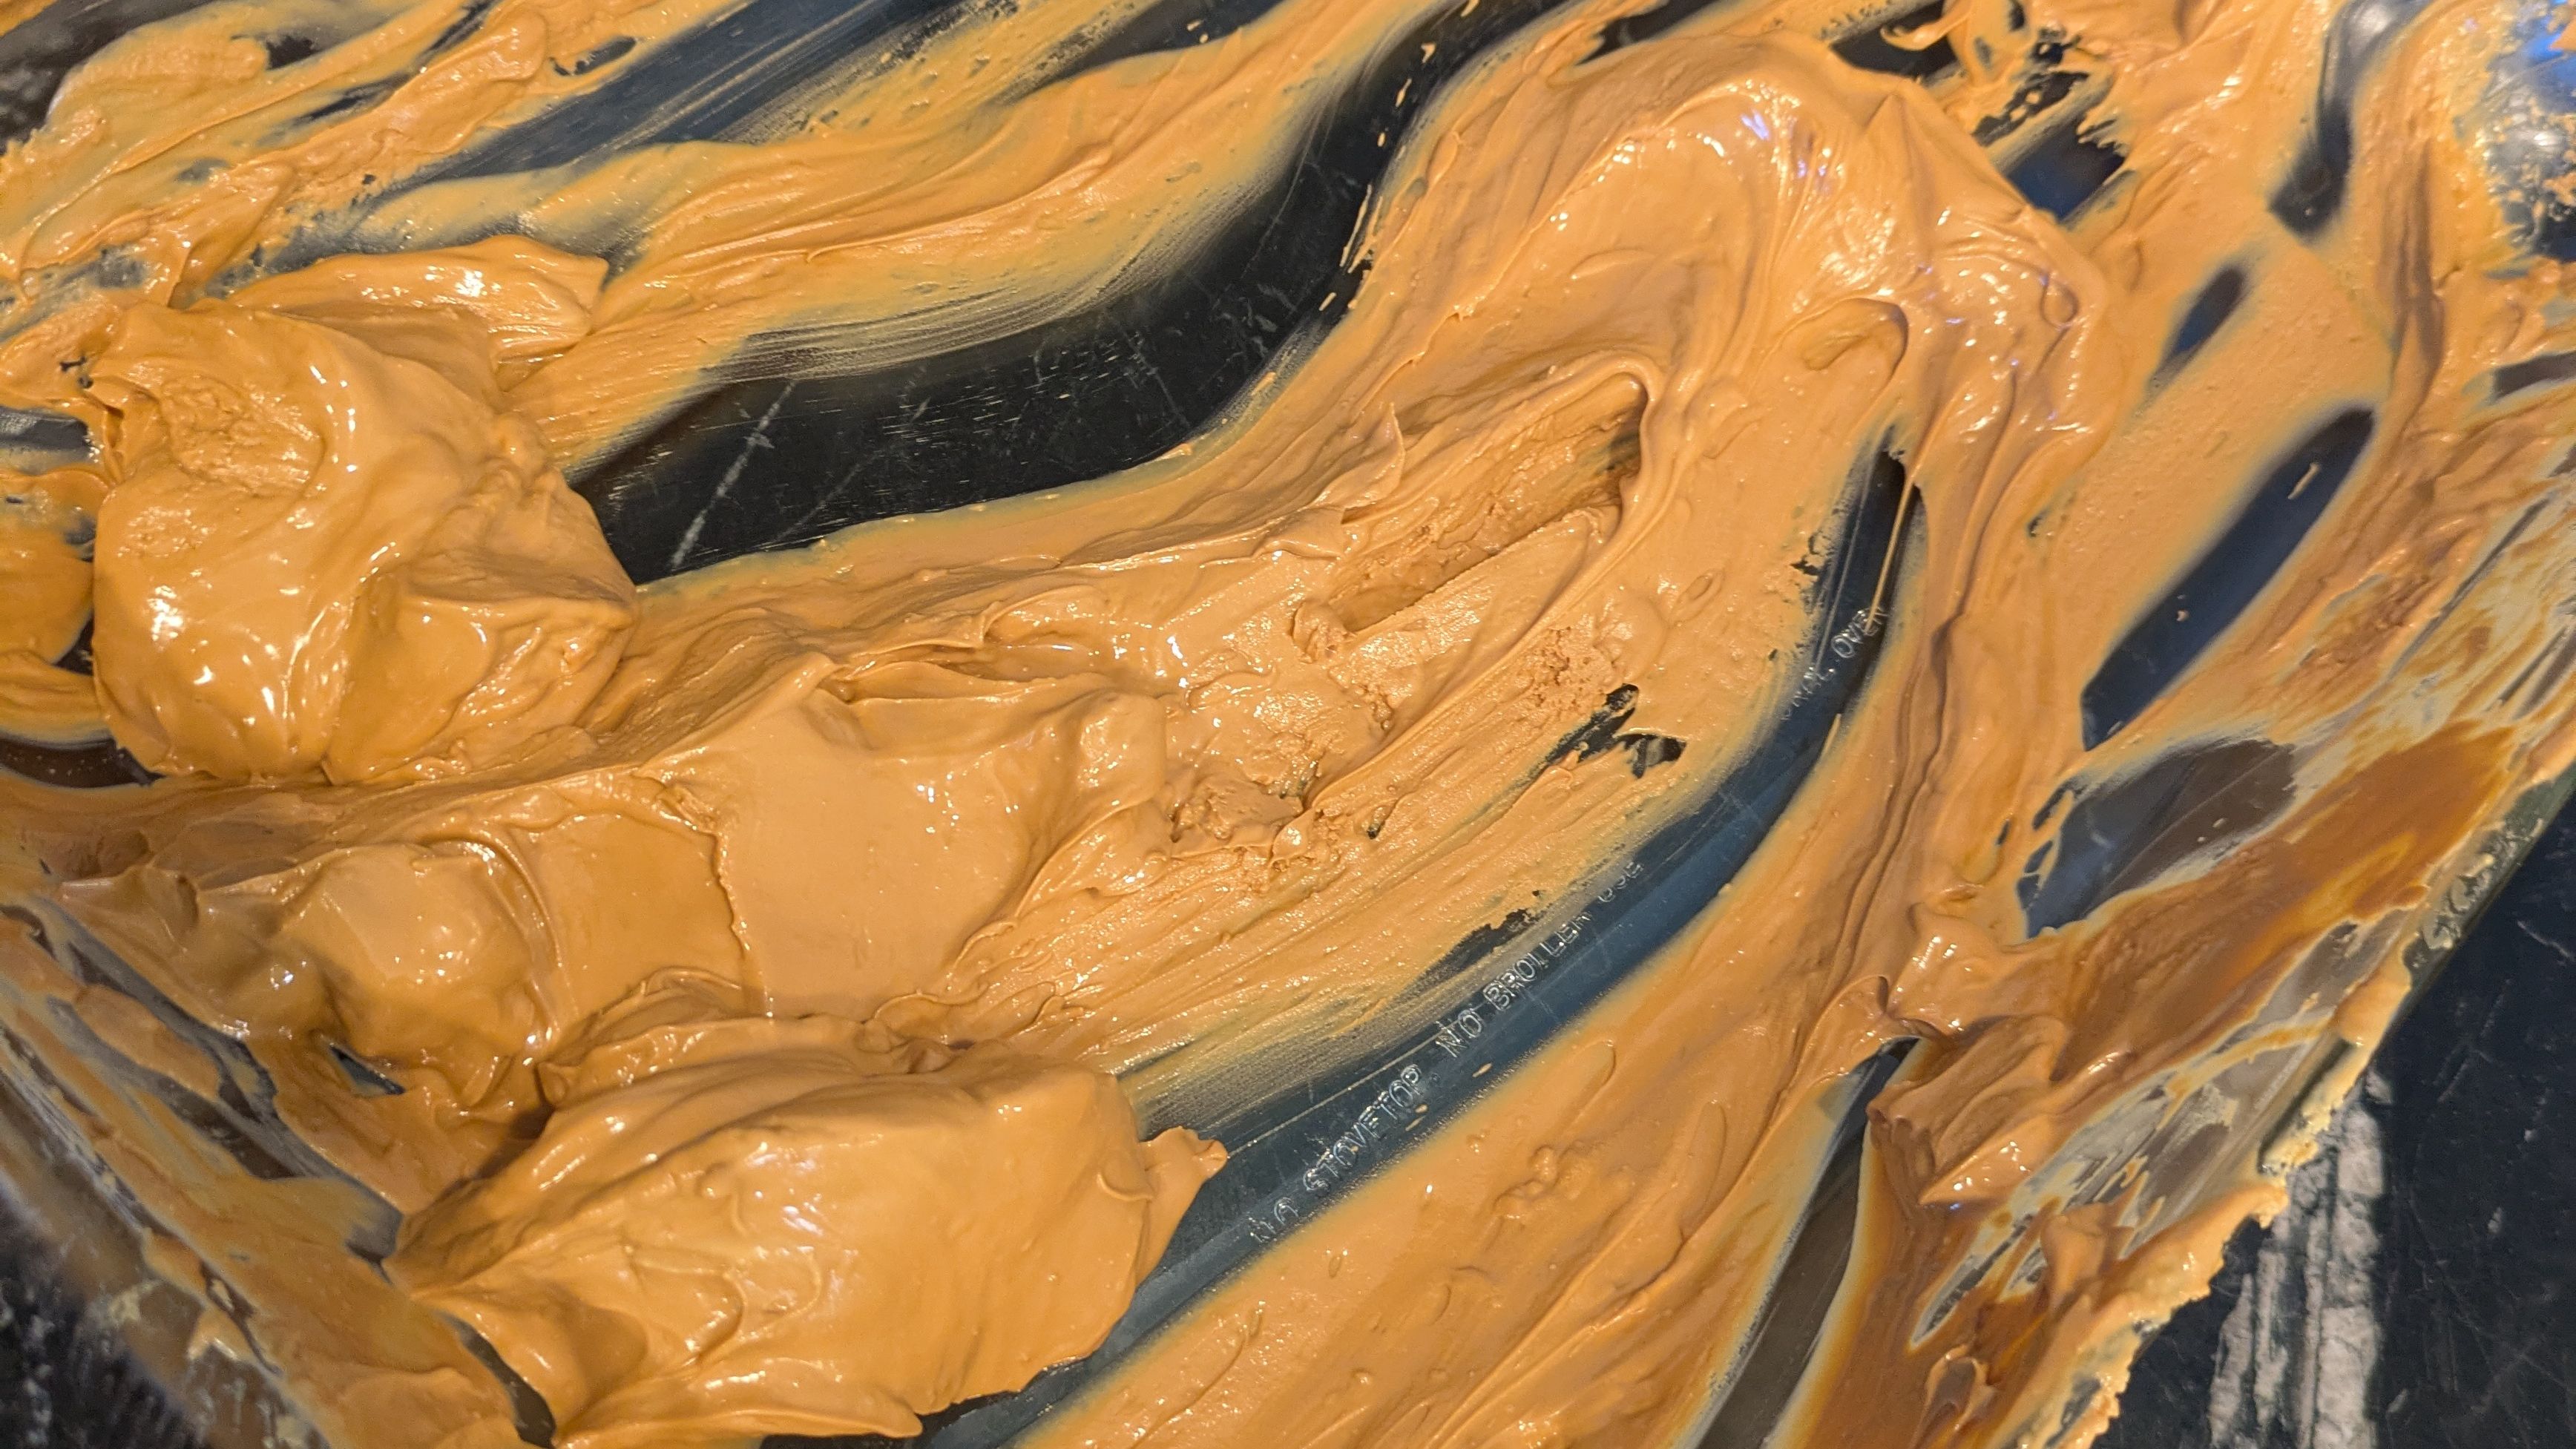
When you roast white chocolate, the first few minutes feel like a total disaster. You start with something glorious—smooth, creamy, sweet—and willingly put it in the oven.
After a few stirs, it looks seized. Grainy. Clumpy. Angry.
You start second-guessing all your decisions. Why would anyone do this to perfectly good white chocolate?
But then... something magical happens.
A rich aroma begins to waft through the kitchen—something akin to brown butter, dulce de leche, and toasted vanilla all at once. The chocolate deepens in color, melts down again, and turns into a golden paste that smells like heaven.
What you’re left with is a mind-blowing flavor bomb that tastes like something between caramel, butterscotch, and a toasty dream.
Kind of like life. Kind of like launching a course during a chaotic week. Kind of like parenting. It feels like a disaster mid-process… until something beautiful emerges.
But unlike life's unexpected events, roasted white chocolate actually does have a rhyme and reason.
Here’s the why—because in this space, we don’t just do things, we understand them.
Real white chocolate is made from cocoa butter, milk solids, sugar, and usually a bit of vanilla. When you roast it slowly and stir consistently, two main things happen:
1. Maillard Reaction
This is a non-enzymatic browning that happens between amino acids (from the milk solids) and sugars. It’s the same reaction that gives seared meats, roasted coffee, and golden pastries their depth and complexity.
2. Separation of the Cocoa Butter
During this process, the cocoa butter can temporarily separate, which causes the “seized” look. But with gentle stirring and time, everything comes back together.
This is exactly why it’s so important to use real white chocolate, not compound chocolate.
Wait—what’s the difference?
Real white chocolate contains cocoa butter—a natural fat derived from the cocoa bean. This is what gives white chocolate its melt-in-your-mouth texture and luxurious mouthfeel.
Compound chocolate, on the other hand, replaces cocoa butter with cheaper fats like palm or vegetable oil. It won’t roast properly. It may burn, separate, or never come back together smoothly. It’s better suited for candy melts, coatings, or decorations—but not for roasting.
Check your label: look for “cocoa butter” in the ingredients list and aim for at least 30% cocoa solids. I use white chocolate callets, which are small, uniform discs made for melting and baking. If you’re starting with a block, just make sure to chop it into even, small pieces so it melts and browns consistently.
🌟 A Quick Note on the Name
You’ll often hear this called “caramelized white chocolate,” and while that name has definitely stuck in the pastry world, I prefer to call it “roasted white chocolate.”
Why? Because technically, it doesn’t go through full caramelization, which requires higher temperatures (usually around 320°F or more). What’s really happening is a Maillard reaction—a browning process between milk proteins and sugars that builds deep, toasty flavors.
So while “caramelized” might sound sexier, “roasted” is a bit more scientifically accurate—and just as delicious.
How to Roast White Chocolate at Home
Want to try this magic for yourself? Here’s how:
Ingredients:
-
Real White Chocolate
💡 Use as much or as little white chocolate as you like—just make sure it’s spread in an even layer on the pan so it roasts evenly. A smaller batch may take a little less time, a larger one a little more.
Instructions:
-
Preheat your oven to 250°F (120°C).
-
Spread the chocolate in an even layer on a rimmed baking sheet lined with a silpat or parchment paper. Alternately, a 9x13 works too.
-
Place the pan in the oven and roast for 10 minutes.
-
Remove, stir well with a heatproof spatula, and return to the oven.
-
Repeat every 10 minutes for 40–60 minutes total, stirring each time.
-
Don’t panic when it looks clumpy or dry around the 20–30 minute mark—just keep stirring. It will come back together.
-
Once it’s a rich, golden brown and smooth, remove from the oven and scrape into a bowl or jar.
-
Use just like you would any other white chocolate: in ganache, to flavor buttercreams, as a snack... the possibilities are endless.
So here’s the big picture:
Sometimes, things fall apart. The plan derails. The tech breaks. Your kid gets sick. Your audio disappears. And yes, even your chocolate might look like it’s having a breakdown.
But if you keep stirring, keep showing up, keep trusting the process—even when it looks like a mess—you might just end up with something that makes you (or your 10-year-old) say:
“This is freaking amazing.”
Because handmade is greater than perfect.
And sometimes the messiest, clumpiest beginnings turn into the most beautiful, delicious endings.
Don’t miss a post, a tip, or a tasty little truth.
The Sweet Skills Digest is your go-to for baking wisdom, new blog drops, exclusive treats, and confidence in the kitchen.
Butter believe it’s worth it. 🍞☺️
We only like SPAM with our eggs, so you don't have to worry about it in your inbox!
